Household Economy
Simple DIY Fixes That Reduce Household Expenses With Immediate Results
Discover easy, effective DIY fixes to reduce household expenses. Follow step-by-step guides, smart shopping tips, and maintenance checklists to save on bills and create a more comfortable, efficient home.
Advertisement
Small changes at home can make a big dent in monthly costs. Instead of watching bills climb, get hands-on and discover practical fixes that truly reduce household expenses over time and right away.
Everyday repairs or replacements may seem dull, but they’re crucial for keeping your wallet full. Tackling problems early is often less expensive, and it offers a satisfying sense of control when surprise costs pop up.
Explore the strategies outlined below—each tip delivers clear steps and visible results. Scroll down for checklists, side-by-side comparisons, and preventive moves you can copy exactly in your home.
Sealing Leaks to Slash Utility Bills from Day One
Reduce wasted energy and water by actively checking for drafts, pipe leaks, and gaps. Sealing these up right away can noticeably reduce household expenses by cutting monthly utility usage within one week.
Caulking, weatherstripping, and patching leaks don’t require expensive tools. Just a tube of sealant, a weatherstrip roll, or pipe tape gets the job done in an afternoon, bringing relief on your next bill.
Spot and Seal Common Drafts for Immediate Impact
Test window edges on a breezy day using your hand for cool air or a lighter flame for tiny movement. Door frames, attic hatches, and baseboards are prime suspects. Mark any drafty spots as you find them.
Apply fresh caulking along inside edges of leaky windows and doors. Replace old, cracked weatherstripping with a peel-and-stick variety. Even rental homes allow these non-permanent upgrades, which can be removed when moving out.
Try this line: “I noticed a chill by the kitchen window—let’s seal it up now before it gets worse.” Each fixed area saves energy, keeps rooms more comfortable, and prevents minor annoyances from growing.
Stop Hidden Water Leaks Before Big Damage Occurs
Feel under sinks, behind toilets, and along basement pipes for dampness. Water meters spinning when no taps run can signal a subtle leak. Note every odd moisture spot for fast investigation.
Wrap pipe joints with plumber’s tape or tighten loose connections. For major leaks, cut water at the shutoff valve and swap out worn washers yourself—search the exact faucet model for free online guides before calling a pro.
By creating a checklist of suspects and working through it each season, you prevent higher water bills and unexpected repair fees. Act quickly even if leaks seem minor—not all problems make obvious puddles right away.
| Problem Area | Typical Symptom | DIY Tool/Material | Actionable Takeaway |
|---|---|---|---|
| Windows | Drafts or whistling sounds | Caulk, weatherstrip | Reseal each spring and fall for year-round comfort |
| Doors | Daylight around frame | Weatherstrip, draft stopper | Install strips and use a door snake after dark |
| Under sinks | Damp or musty odors | Plumber’s tape, wrench | Tighten and retape joints immediately |
| Exposed pipes | Corrosion or mineral stains | Pipe insulation, tape | Insulate to prevent sweating and future leaks |
| Attic hatches | Temperature swings | Weatherstrip, foam seal | Seal hatch perimeters to trap air indoors |
Insulating for Year-Round Energy Savings and Comfort
Adding or upgrading insulation pays for itself through smaller heating and cooling bills. Prioritize attics, crawlspaces, and basement areas for the fastest way to reduce household expenses over every season.
Even DIY rolls, foam boards, or spray cans work for these spaces. Don’t skip thin, old, or missing insulation—addressing these now keeps heat where you want it and prevents seasonal drafts or stuffiness.
Pinpoint Where Insulation Matters Most
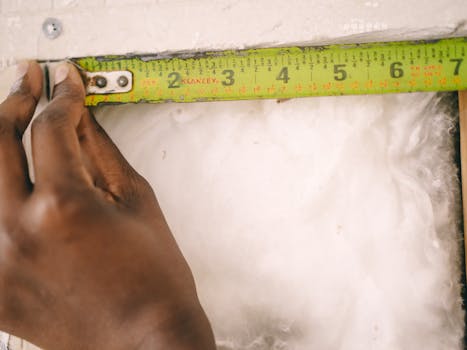
Start with the attic: If the rafters or floor joists are visible, more insulation is needed. Place a ruler in the insulation to check its depth—aim for at least 10 to 14 inches where winters are cold.
For basements and crawlspaces, touch the bare walls. If they feel cool year-round, add rigid foam panels against the concrete. In summer, insulate rim joists to block heat from seeping inside.
Gaps near outlets and light switches benefit from spray foam behind the covers. Every filled spot means less airflow and savings month after month. Repeat this process as you change air filters for a routine home check.
- Add attic insulation above bedrooms for immediate comfort and lower heating bills. Use unfaced batts laid perpendicular to the existing layer for the best coverage.
- Install foam gaskets behind all light switch and outlet covers outside on exterior walls. This stops drafts creeping in and prevents wall surfaces from feeling cold.
- Upgrade garage ceiling insulation if a bedroom sits above it, keeping floors warmer in winter and cooler in summer while reducing household expenses for climate control.
- Use spray foam to fill gaps around basement windows and crawlspace vents. These tiny leaks add up quickly, especially in older homes full of surprises.
- Regularly check the seals and weatherstripping inside attic hatches or pull-down stairs. Foam tape or new seals prevent heat loss where insulation is missing or compressed.
Improved insulation doesn’t just mean comfort—it directly shrinks your utility spend. Each action here is a one-time job with year-round returns, making these fixes worth a weekend.
Choosing the Right Materials for Insulation Upgrades
Fiberglass batts are affordable and simple to install between joists. They work well for wide, accessible spaces like attics or open basements. Wear gloves and a dust mask to stay safe.
Foam board insulation excels in tight or damp spots—like crawlspaces—thanks to its water resistance. Cut with a utility knife and fit snuggly against walls or foundation floors for the best thermal seal.
Spray foam works for odd-shaped gaps around pipes, wiring, or vents. It expands to fill in holes and requires minimal clean-up once cured. Have solvent or gloves ready to handle sticky excess.
- Lay fiberglass batts perpendicular for layered protection.
- Attach foam board panels with construction adhesive.
- Seal odd gaps using spray foam for an airtight fit.
- Use rigid boards for moisture-prone basement walls.
- Test attic depths with a yardstick on each visit.
Commit to regular insulation upgrades on a set schedule—maybe after the first heat or AC bill spike. Routine checks beat emergency fixes and keep living spaces pleasant all year.
Keeping Appliances Efficient Without Professional Help
Tuned-up appliances use less energy and avoid breakdowns. Commit to easy maintenance tasks that help reduce household expenses, sidestep midlife failures, and help machines work like new for years.
Annual cleaning and part replacement fit into a single weekend morning. Follow simple sequences for major home appliances, and save money while keeping everything running quietly and efficiently.
Simple Sequences: Clean and Maintain Key Machines
Unplug your refrigerator, then pull it away from the wall. Dust coils with a soft brush or vacuum attachment, removing the gray fuzz that makes the compressor work harder.
For your washer—run an empty hot cycle with white vinegar every few months. This removes lint, detergent clogs, and mild odors. Replace old hoses every five years to avoid sudden leaks or flooding surprises.
In dishwashers, check spray arms for blockages. Use a toothpick to clear holes and run a cup of vinegar inside for a fresh, residue-free clean. Chemical-free methods preserve gaskets and seals inside each machine.
Checklists and Quick Reference Tasks for the Year
Try this script when you forget: “This Sunday is for home appliance checks—one hour now keeps repair bills away.” Add reminders to your phone each quarter to stay on track.
Keep replacement parts handy: fridge filters, washer hoses, and light bulbs each have storage space on your laundry shelf. Buying in advance saves panic runs to the hardware store at premium prices.
Watch for signs of wear: slow refrigerator cooling, puddles behind machines, or odd washing machine noises signal overdue upkeep. Lay out tools the night before so you’re set to handle each task in one go.
Protecting Surfaces for Fewer Repairs and Replacements
By preventing scratches, chips, and stains on floors, countertops, and walls, you preserve your home’s value and avoid the cost of early updates. Each preventive fix cuts down on repairs, helping reduce household expenses long-term.
Focus on high-traffic or high-use surfaces first: kitchen counters, bathroom vanities, hardwood floors, and painted baseboards. Protecting these areas is a practical habit worth building into your routine.
Apply Surface Protection: Rugs, Mats, and Pads
Lay entry mats both inside and outside your doors. This traps dirt, mud, and grit before they scratch up hardwood or tile. Use area rugs in walking paths and under furniture legs for an added barrier.
Install clear adhesive pads beneath chair and table legs. They glide across the floor without carving lines into wood or laminate. In homes with pets or children, increase coverage in play zones for extra insurance.
Seal countertops using a safe, food-grade protector recommended for your material—marble, granite, or wood. Apply regularly as directed, and spills or stains will wipe away instead of soaking in and leaving marks you can’t erase.
Keep Touch-Up Supplies Handy for Fast Fixes
Store a jar of matching paint, a small brush, and wood touch-up markers in an easy-to-reach cabinet. Fill in dings or color-matched scratches the morning you notice them—fresh repairs blend better and block water damage.
Use a damp microfiber cloth to spot-clean scuffs or crayon marks on painted surfaces. For stubborn stains, make a gentle paste with baking soda and water before resorting to stronger cleaners. Gentler steps extend the life of delicate wall or trim paint.
Reapply clear floor polish twice a year for a deep shine and protective layer. Waiting until scratches build up often means costly sanding or full refinishing. Aim for small, regular efforts as the path to big savings.
Lighting Choices That Cut Costs without Sacrificing Ambience
Switching to modern lighting solutions balances comfort with reduced utility costs. LED bulbs, dimmers, and smart timers all help you reduce household expenses and set the right mood for any occasion.
Begin by replacing the most-used fixtures—kitchen, bathroom, front porch—and expand your effort room by room. Don’t wait for old bulbs to burn out. Upgrades pay off immediately, both in brightness and wallet relief.
Pick the Best Bulb for Each Room’s Task
In kitchens or offices, use daylight-colored LEDs for sharpness and focus. Living rooms benefit from soft white bulbs to create a cozy feel during family nights.
Install dimmer switches for dining and bedrooms. Mood lighting gives you options, and a lower setting saves additional power while relaxing. Stick to fixtures rated for dimmer use to avoid flickering or buzzing.
If lamps are used for reading, select bulbs labeled “high CRI” for color accuracy—they mimic sunlight better and protect eyesight. Mark each upgrade date on your calendar, and track bills for proof of small wins.
Increase Control with Timers and Smart Plugs
Set up basic plug-in timers for outdoor or holiday lights. Schedule them to run only when needed, which trims electricity use and keeps unwanted visitors guessing when you’re away.
Smart plugs offer phone-based controls so you can switch off electronics remotely. This prevents “phantom” energy drain by televisions, game consoles, and chargers left in standby mode.
Test your system for a week: “I’m tracking how many lights I forget to turn off.” Small behavioral tweaks, paired with smart plugs, bring discipline to energy use in busy households.
Reducing Waste with Smart Purchasing and Routine Maintenance
Thoughtful buying and maintenance routines reduce waste and ongoing expenses. Combine smart shopping choices with basics like regular filter changes for the biggest impact on future bills and trips to the store.
Buy in bulk only for staples you’ll truly use—like paper towels, cleaning supplies, or batteries. This limits spoilage or clutter while delivering the savings you expect from larger packs.
Focus on Reusables and Restock Core Supplies
Switch to washable towels for cleaning glass, counters, and bathrooms. Reserve single-use paper towels for greasy spills. This simple swap drastically cuts your monthly spend on disposables while protecting the environment.
Opt for refills instead of single packs—dishwashing liquid, soap, or hand sanitizer. Refill stations at many stores make it easy and reduce both cost and packaging waste. Keep a checklist taped inside your pantry door for smooth restocks.
Schedule monthly filter checks for appliances—ACs, water pitchers, or vacuum cleaners. Replacing filters before dirt builds up extends equipment life. Mark each change date right on the filter or in your calendar app for peace of mind.
Summary: Building Savings One Small Fix at a Time
Each DIY approach shared above puts you in control, trims recurring bills, and helps reduce household expenses. These fixes also deliver a more comfortable, resilient, and personalized living space every month of the year.
By sealing, insulating, protecting, and upgrading wisely, you transform maintenance into positive action—not just fixing but preventing future surprises. Step-by-step routines nurture confidence and save money with every small win.
With a clear plan and regular reminders, homeowners can expect lasting savings and pride in self-reliance. Start with just one idea today—the results compound quickly to create peace of mind and financial breathing room.
Frequently Asked Questions
What’s the first DIY fix to help reduce household expenses?
Start by checking for air and water leaks. Sealing drafts around windows, doors, and pipes makes a noticeable difference on your next utility bill and prevents bigger problems later.
How can I know if my appliances need attention for savings?
If your appliances make unusual noises, run longer cycles, or don’t clean/cool as well as before, it’s time for maintenance. Clean coils, change filters, and look for early signs of wear and tear.
What’s the best lighting change to save money?
Switch the most-used light fixtures to LED bulbs and install dimmer switches where possible. This immediately reduces electricity use and lets you adjust lighting to suit your mood or task, without waste.
How frequently do insulation and surface protection upgrades pay off?
Insulation upgrades show results in the next energy bill—especially after seasonal shifts. Surface protection lasts longer, cutting down future repair costs and keeping spaces looking new much longer.
Which routine delivers the largest long-term savings?
Combining sealing leaks, maintaining insulation, and routine appliance upkeep delivers the biggest cumulative savings. Each fix builds upon the last, lowering bills and extending the life of your home’s core systems.


